Task Instructions:
Now that we’ve found a malicious artifact, the next step is to understand what it’s doing. Identify some characteristics of the communications between the malicious artifact and the LP.
Enter the IP of the LP that the malicious artifact sends data to
Enter the public key of the LP (hex encoded)
Enter the version number reported by the malware
Writeup
For this task, I feel that I took the quick and dirty approach, combining a bit of static and dynamic analysis to extract the necessary information needed to complete it. I did all of the analysis both on my windows machine as well as a docker containter built by the provided image from the last task.
Setting Up the Environment
Firstly, I had to load the image and spin up the container. I decided to debug within the container due to the fact that it held all of the dependencies necessary for the malware to run as intended. We can do so in a linux box with Docker via these commands:
docker load --input image.tar
docker run -it panic-nightly-test sh
Be sure to include the sh at the end in order to gain the shell. If you omit it, it will spin up and crash due to the startup script failing.
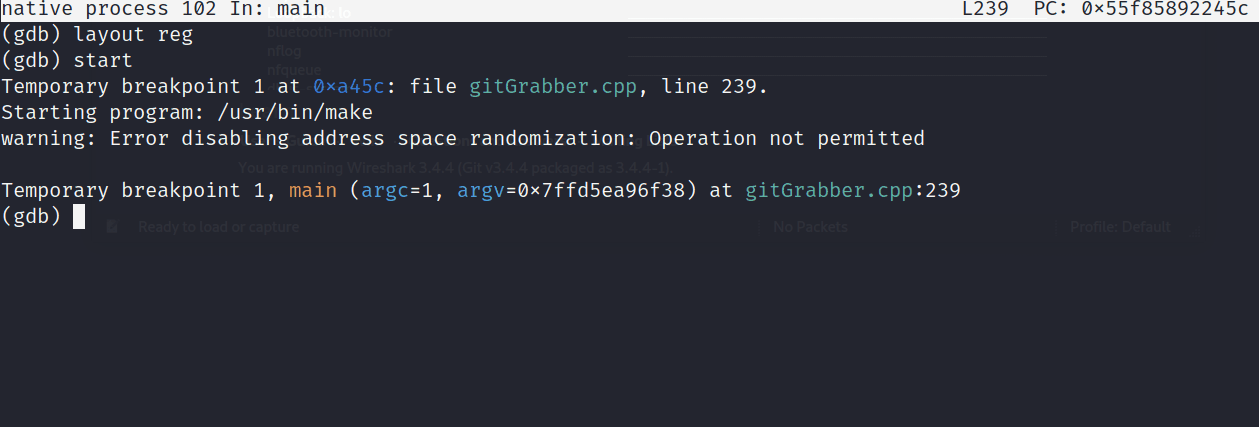
Now that we’ve got the container up and running, we can see that it’s Alpine linux, meaning in order to get our tools, we need to make use of the apk command. I took on this challenge with the bare bones gdb, seeing that it was a c++ binary in a linux environment.
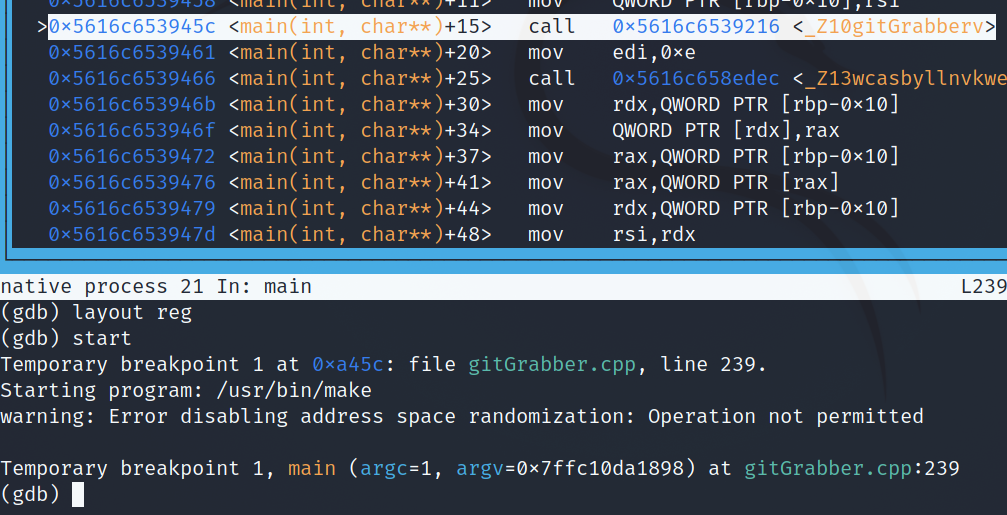
From here, we just need to navigate to the malicious make in /usr/bin and start debugging. Simultaneously, I had my other copy of make open in Ghidra, so I could follow along with the execution of code.
Furthermore, I personally like to use the terminal user interface built into gdb as it can display the assembly, registers, and breakpoints as we step through the malware. I also like to view the assembly in intel syntax, as I’m more familiar with it. We can do this like so:
gdb make
set disassembly-flavor intel
layout asm
layout reg
GDB Setup
Reversing
Finding the IP of the LP
Luckily, this binary wasn’t stripped of debug symbols, allowing us to successfully debug it without too many hiccups. There is even a well-defined main(), which is a good starting point to explore this program. Some of the subroutines are either mangled or have their names obfuscated, but that isn’t much of a problem as we begin to walk through the execution of code and observe the disassembly as well as the decompilation.
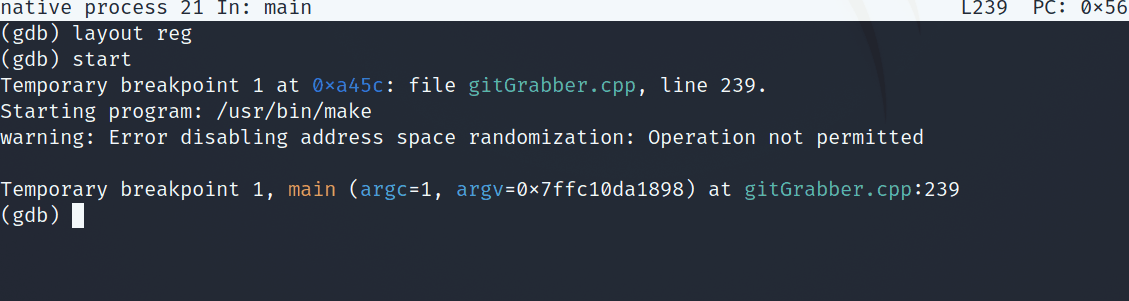
If we run start in the debugger, it will take us to the entry-point of the program, a call to a subroutine named gitGrabber(). Before proceeding, let’s take a look at this function in Ghidra.
Starting Point
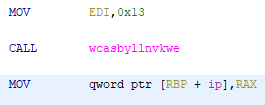
Off the bat, we can see a variable that potentially holds the IP of the LP, called ip. Upon checking its XREFs (Cross-references), it gets initialized with 0x0 and defined after a call to wcasbyllnvkwe(). This function also took 0x13 as a parameter. We can infer that the return value of the function gets stored into ip, because return values typically get stored in RAX. And, then we can see a MOV of whatever gets stored into RAX to ip.
ip Getting Defined
Checking out the decompilation of the wcasbyllnvkwe() function, we can see that its parameter is called stringId. It utilizes a switch-case statement to return a char* (string) based on the stringId, and there is even a case defined for the value of 0x13. From here, we can ensure that it is a safe bet that calling this function with 0x13 will show us whatever string gets stored in ip for gitGrabber() to use.
Optionally, you can rename functions in Ghidra with L. I used getString.
Decompilation for Case 0x13 - Potential IP

Popping back into the debugger, we can run this function, passing it 0x13 as a parameter to see what gets stored in the ip variable.
Calling wcasbyllnvkwei(0x13)
Awesome, we get a valid IP address: 192.51.100.53. As a sanity check, I decided to also pop open WireShark and check out this malware’s network traffic. However, running this binary in the docker container would fail to produce any traffic. This may be due to some cleanup performed, or the fact that the ip’s and urls in the challenge are anonymized/ disabled. From this point, I dove into what happens after ip is defined.
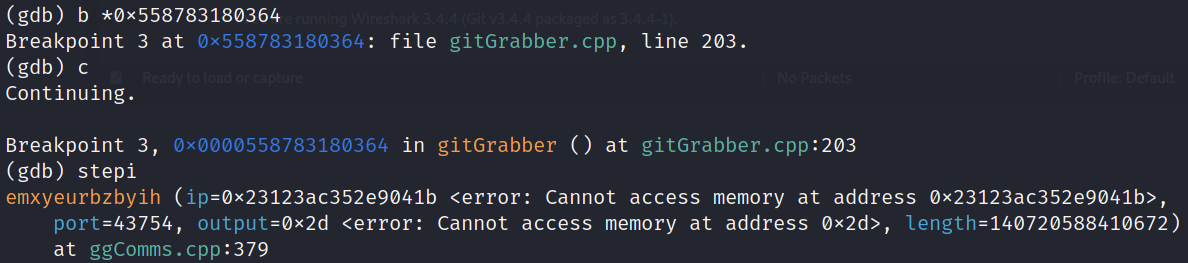
Back in gitGrabber(), after defining ip with 192.51.100.53, we can see a call to emxyeurbzbyih(). It takes a few parameters, namely: ip, port, output, and length. It’s doing all sorts of things, especially calling the getString() function we observed earlier to define more variables to use. One more host-based signature we can see that it defines is the version_00 which is defined by getString(0x11). We will investigate that for the task later.
emxyeurbzbyih() Parameters

However, there is another subroutine call to isbrtadsiixgv(), taking the ip and port as parameters. At this point, I wanted to run the program up until we could stepinto isbrtadsiixgv(), to take a clearer look at the values defined. This will take some manipulation of the binary as there are many checks to correctly run it without fail.
isbrtadsiixgv() Parameters

Exploiting the make Binary
At this point we need to stepinto gitGrabber() and navigate our way to emxyeurbzbyih() and take a look at isbrtadsiixgv(). Scrolling through the disassembly of gitGrabber() we can see a couple of roadblocks we need to bypass. It starts by initializing its local variables with some empty values, but then we reach a cmp and je. We don’t want it to jump over to a different part of the function yet, so we may or may not need to modify the values that are being compared to keep it running the way we want.
First Control Flow to Bypass

We can set a breakpoint to the part right before the cmp, where it stores whatever is in eax to the local variable. From there, we can observe the register to see if it will trigger the redirect in the flow of execution. Essentially, we will check if the value in eax at that point is equal to 0xfffffff
After setting the breakpoint, I ran c to continue to it, and used x $eax to take a look at the stored value. We can also take a look at it above the disassembly if you set up the debugger with the tui the way described above.
Setting Breakpoint, Continuing, Observing eax Register


From here, it looks like it will jump, which is what we don’t want yet. We can change the value in eax with set $eax = 0x0, in order to bypass this control flow. In essence, we changed the value that gets stored into the variable that gets compared to 0xffffff, which in turn changed the execution of the program. We are now a bit closer to where we want to get.
We can do this like so:
hitting the return key after a command will re-run it. I used it for the ni (next instruction) command to check if we successfully bypassed.
Successful Bypass

It looks like we successfully changed the execution; however, there is another cmp to bypass. This time, it tests al with itself and then jumps if they’re not equal via jne. Using the same method, we need to ensure that al is equal to itself before continuing to push further into gitGrabber().
Second Control Flow Bypass


A few instructions after, there is a third and final control flow to bypass. We can do it by deploying the same method as the previous two. This time it stores whatever is in eax into a local variable and jumps to a different section if it is not equal to 0x0 via jne.
Third Control Flow Bypass

After this point, we can observe the part where ip gets initialized by the call, getString(0x13) then the call to the next function we want to stepinto. All we need to do is set another breakpoint where emxyeurbzbyih(), continue onto it and step into the subroutine.
Stepping into emxyeurbzbyih()
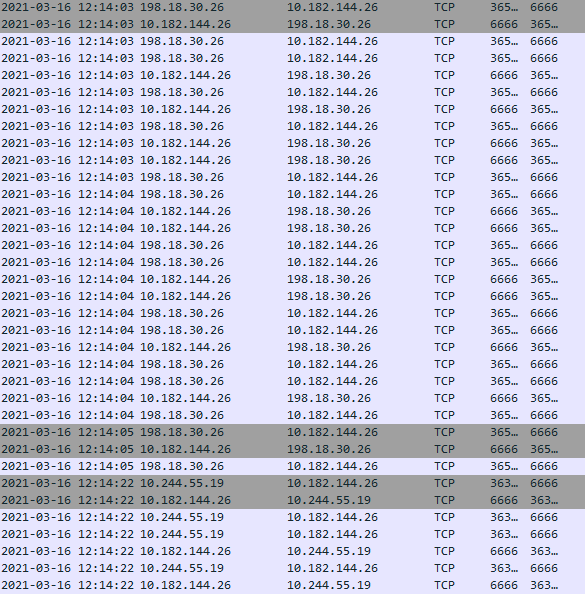
Interestingly enough, it looks like it’s called ggComms. We can hop back into Ghidra and rename this function for clarity purposes moving forward. Now, what we need to do is see if we can make our way to the networking-type function, isbrtadsiixgv().
Taking a look at the decompilation of ggComms, there is a lot of initialization of local variables, but it doesn’t seem to have anything we would need to bypass. So, a simple breakpoint and continue will do.
Passed Arguments to isbrtadsiixgv()

Nice, we now have an ip and port confirmed. This particular instance of malware decides to communicate over 198.51.100.53:6666. Typically, different malware versions can change these values in order to evade detections, but I went out on a whim and tried to see if I can find any traffic assocaited with either of these values from the pcap provided from task01. Luckily enough, we can catch a ton of traffic over the unusual port of 6666 on the day that the alleged attack occured.
WireShark Sanity Check
With this I was comfortable enough to use 192.51.100.53 as my answer for the IP of the LP portion. At this point we can start hunting for the hex encoded public key.
Finding the Public Key
Before debugging any further, I decided to check out more subroutines to see if the public key gets defined anywhere. Luckily, it’s a cleanly-written program for malware, and the author was kind enough to not obfuscate variable names. Back in the ggComms() function, there is a call to orhtyltfkkwhg(), with some interesting local variables, pubKey, public_key, and client_public.
We can even see that pubKey gets defined by our getString(), passing 0x12 as the stringId. Now the only piece of crucial information before checking out getString(0x12) is the length of the key. This prompted me to start debugging again in order to observe how much space was allocated for it.
Public Key Variables

I renamed the isbrtadsiixgv() function to establishConnection() and took a look at it in Ghidra before continuing. We can see that there are a couple of control flows to bypass in order to avoid accidentally communicating with the attacker’s server. This first one makes a cmp with a local variable and 0x0 to check if the sign flag is set (checking if the value is negative) via js. So we need to fuzz the value with a negative number, because we do not want this portion to run.
Avoiding Connection to Attacker’s Server
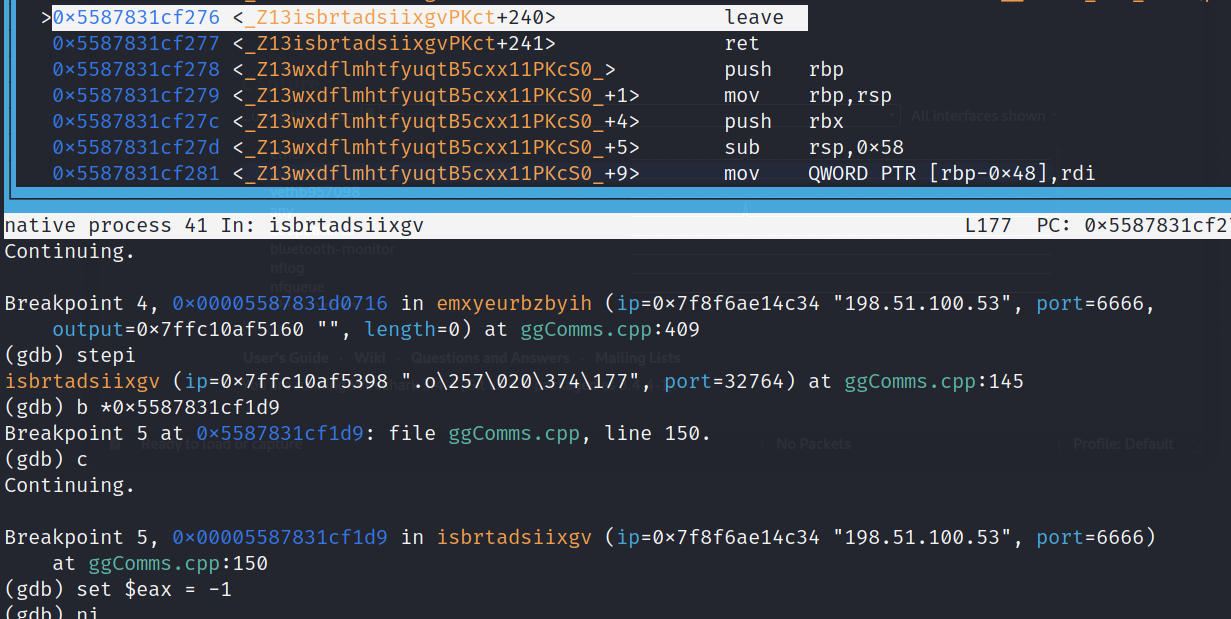
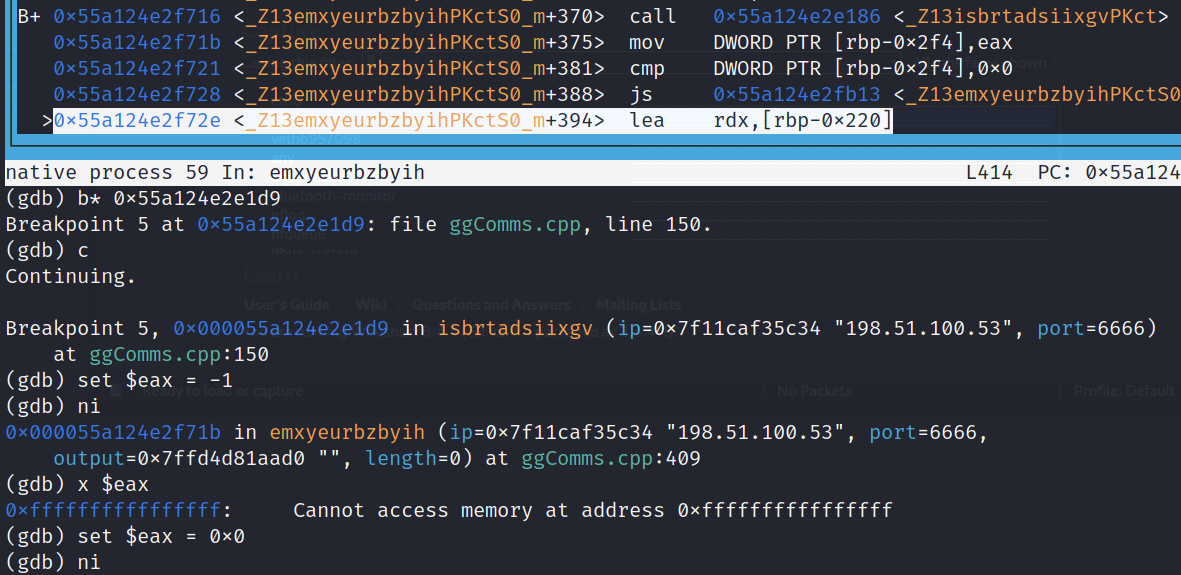
Now that we successfully avoided establishing a connection, we can make our way to the orhtyltfkkwhg() function that contains the public key variables. Upon returning from establishConnection() we are met with one more control flow that we want to actually jump into to get to orhtyltfkkwhg(). We are essentially trying to make the program think that we successfully established a connection with the server. It checks based on the return value from the last function.
This time, it checks to see if the value in the local variable is negative. We can fuzz this variable with a non-negative number to ensure that we jump into the code block that we want. After jumping to where we want to be, we can now hop our way into orhtyltfkkwhg()
Manipulating Control Flow
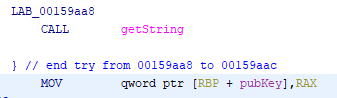
Upon stepping into orhtyltfkkwhg(), the thing we are interested in is trying to see the size of the public key. This will correspond with how much memory is allocated for the public key variables we were able to observe in Ghidra. In order to do so, I set a breakpoint at the part where pubKey gets initialized via the getString(0x12) function.
From there we can run the command info locals and see that client_public has 32 bytes allocated for the public key, and pubKey has some random bytes stored in it.
Memory Allocated for Public Key (Dynamic)

To confirm this statically, we can take a look at the disassembly and see that pubKey is a qword ptr, meaning there are 32-bits allocated for that variable. In this code snippet, we can also see the call to getString() that defines it.
Memory Allocated for Public Key (Static)
All that’s left from here is to hex-encode the public key obtained from calling getString(0x12)
An important thing to note is that because of endianess, these bits may actually be stored backwards. So, to get the proper format after calling the function, we need to set it from little to big via set endian big
Hex-Encoded 32-bit Public Key

c025488f15bca089c38d45cf3688e9bfbc0dc762bb681ba3d9f936e30f0e8b40
The command x/32x allows us to x-amine the return value, $1 in a 32-bit, hex-encoded format
Finding the Version Number
As noted earlier, we spotted an interesting local variable in ggComms called version_00 that gets initialized with getString(0x11). Let’s hop into gdb and see if we can pull a version from the returned string.
Version Number
After a bit of reverse engineering, we have successfully pulled the IP address of the attacker’s LP, a good network-based signature, a public key that it uses to encrypt its message, and a specific version number, which is a good host-based signature. From here, another security team may be able to infiltrate the attacker’s infrastructure to prevent attacks, mitigate damage done, and even build a threat intelligence profile.
