In order to simplify the installation and configuration of our at-home pentesting lab, CodePath has created and pre-configured Docker containers to help us get set up with a few simple keystrokes.
For those of you who don’t know, Docker is a service that allows developers to pre-configure packages with all the dependencies needed in order to successfully run a program or service. It runs at the kernel level and allows for extremely fast, light-weight, virtual environments in which you can do a multitude of things such as develop software and, in our case, set up a penetration testing lab for WordPress.
Our Docker containers will include:
- WordPress vulnerable container (hosted locally)
- A kali container as root
- A mySql container as a database
Step 1: Getting Docker
Docker install links:
Windows 10 users, you must be running version 19041 or higher. Windows 11 users, you must be running version 21H2 or higher. WSL2 must also be installed to support Docker. For Mac OSX users, you must start up Docker from the CLI.
Once installed you can run docker --version to ensure that everything ran correctly and that Docker is on your system.

Step 2: Getting the Images and Docker Files
Another wonderful thing about Docker is that it heavily supports open source development and people can make their containers available for install and use to the general public. We will be pulling a githup repo that contains all of the necessary Docker files onto our machines.
From there, all we have to do is spin it up and sit tight for a couple of minutes.
The first thing to do is create a directory in which we can hold all of the files for our lab this week. I’ve opted to create a codepath folder on my desktop. I recommend doing it this way so nothing gets lost, and we can keep all of our related files together.
On windows:
cd $HOME/desktop
mkdir codepath/kalivswp
cd wpvskali
In this directory, we can clone the repo like so
git clone https://github.com/0xrutvij/wpVSkali.git
After doing so, check if all of the files are in our kalivswp directory. Cloning the repository will create a new folder named wpVSkali. We can check the files with:

Step 3: Spinning Up The Containers
Before proceeding, within the wpVSkali directory, we need to add an additional directory called wpFolder. Simply run mkdir wpFolder
Now that we have all the files we need to actually build and use our containers, all we need to do is run some Docker commands and let it work its magic for a few minutes.
In the wpVSkali directory, we need to build the containers from the images. Once built, they will be up and running. From there we can verify this.
For Mac Users: you must run DOCKER_BUILDKIT=1 docker-compose build before proceeding. Windows users can skip this step.
The command to run from here is:

After a couple minutes or less, you should get some success messages confirming that three containers have started:

As a sanity check, run:
You should see three containers up and running, along with their CONTAINER ID’s.

Now, for further sanity checking, we must ensure that the container for our WordPress server is up and accessible. To do so, open up your browser and navigate to http://localhost:8080/.
If localhost does not work try:
http://0.0.0.0:8080/http://127.0.0.1:8080/
After clicking the install button for WordPress and setting up your admin credentials, you should be able to view your WordPress site that is up and running locally on your very own machine and network. I decided to name mine hackthisbox.

Now that we have our vulnerable site up and running, we will also check our Kali machine and if it can access our WordPress site. Back on the command line, run:
docker exec -it <CONTAINER ID> bash
The CONTAINER ID should correspond with the kali box. You can see it from the docker ps -a command.
If you have successfully followed the installation guide to this point, you should have your vulnerable WordPress Server up and running in your browser, and you should be accessing the Kali container from your command line.
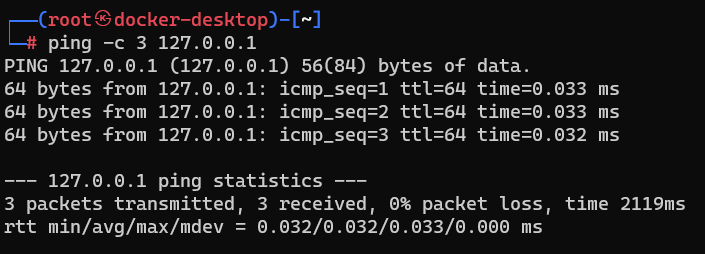
The last thing do do for this step is to ensure that our Kali container can communicate with our WordPress server. A neat network troubleshooting tool is ping, and we will take advantage of it like so:
This will send 3 little packets over to our server, and report if they are dropped or recieved. If recieved, we now know that our Kali box can reach our WordPress server.
At this point, we now have our home lab set up and ready to be tweaked/ experimented with! Kali comes default with a plethora of tools we will be unleashing on our vulnerable site; however, for the purposes of our lab, we must properly configure wpscan.
Step 4: Configuring and Using wpscan
In the Kali box, run:
And your expected output should be:
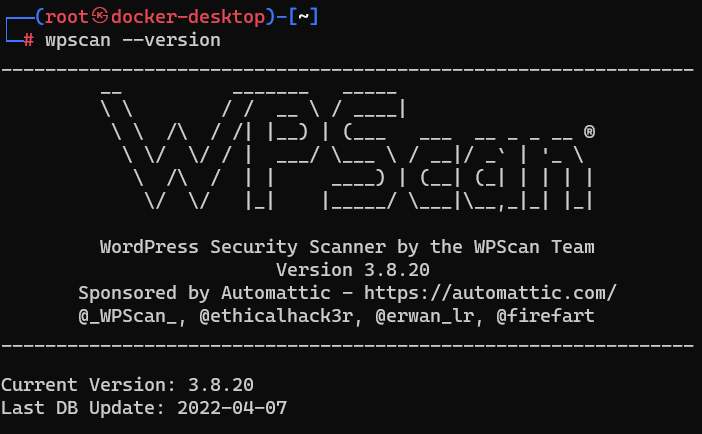
If your current version doesn’t match, or if you would like it to be the latest, run wpscan --update
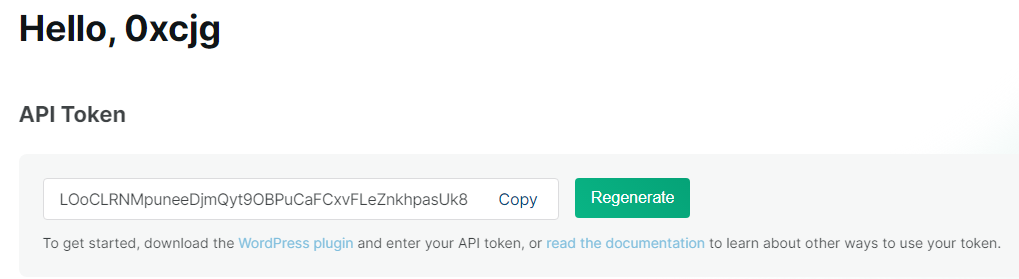
One thing to note about wpscan specifically is it requries the use of an api token, which in turn, requires that we register and make an account at https://wpscan.com/. Once registered and logged in, you can locate your api token here:
With this token, we can now conduct a scan against our WordPress server. The command is:
wpscan --url http://localhost:8080 --api-token <paste your token here>

Observing the output from wpscan we can see all of the vulnerabilities that it reports! Since this is a lab, make sure you mess around with your site, adding more and more to the attack surface for wpscan to pick up on. Practice by exploiting the vulnerabilities you incorporate and overall, have fun with it!
Step 5: Cleanup
Since we will not be running our containers 24/7 we need to know how to shut them off and be able to spin them back up for later use.
We can exit the kali container with:
From here, we need to run:

With that, you’ve shut down your containers; however, spinning them back up is as simple as: